Bypassing SSL certificate pinning on Android for MITM attacks
To discover and trace (undocumented) APIs on the Internet, a common method is to use an HTTPS proxy server to intercept traffic from an application to a server; a man-in-the-middle (MITM) attack. Typically all traffic nowadays is sent over TLS, so the proxy server needs to spoof a SSL certificate.
This technique works only if the app accepts the SSL connection, which typically it does only when its local certificate store has a Certificate Authority (CA) certificate that matches the one in the chain of the certificate generated by the HTTPS proxy server. So as long as we make sure the CA certificate of the HTTPS proxy is installed as a trusted source, the app won’t care that the SSL certificate offered by the server is rogue.
However, some apps take an additional security measure called SSL certificate pinning. Essentially it means the app compares the public key of the CA certificate from the server against a “pinned” public key that comes bundled with the app. If it’s not the same, the app declines the connection. Because the public key of a rogue CA certificate from the HTTPS proxy server will never match the pinned key in the app, no connection is established and there’s no data to intercept.
To bypass SSL certificate pinning on Android, we use Frida, an open source instrumentation toolkit which can be used to tamper with apps at runtime, and alter their SSL pinning behaviour.
This guide walks you through the steps of setting up a MITM attack and using Frida to bypass SSL pinning.
For the example in this guide I’m using the Android app of Funda, a real estate listing service that’s well known in The Netherlands. The app implements a SSL pinning technique. Funda is free to use, but their APIs aren’t freely accessible. This makes it an interesting research target. The bypass technique used in this guide should apply to most apps, but your mileage may vary.
Requirements
Installing and running Android-x86
Follow the instructions for installing and running Android-x86 on VirtualBox.
If mouse control isn’t working in the VM, disable “Mouse Integration” from the “Input” menu in VirtualBox.
I setup a bridged network adapter for the VM, which is the easiest way to connect from host to guest and vice versa.
The easiest way on macOS to install Android SDK Platform Tools is by using Homebrew:
brew cask install android-platform-toolsConnect to the Android VM using adb
On the VM running Android, use the app “Terminal Emulator” to open a shell and make a note of the assigned IP address of the box is on the virtual network adapter, assuming its connected to a network where a DHCP server is running:
ifconfig eth0On your host machine, connect to the Android box using adb, replacing the IP
address with the one acquired in the previous step:
adb connect 192.168.178.179Running mitmproxy on the host
Install mitmproxy on your host machine, e.g. on macOS:
brew install mitmproxyThen run it:
mitmproxyBy default, mitmproxy binds on all network interfaces, on port 8080.
Copy the rogue CA certificate that mitmproxy generated to the Android box:
adb push ~/.mitmproxy/mitmproxy-ca-cert.cer /data/local/tmp/cert-der.crtIt will be used later by the “repinning” Frida script.
Using the proxy server
To configure the Android box to use the proxy server, run the following command from the host machine, replacing the IP address with the IP address of the host machine:
adb shell settings put global http_proxy 192.168.178.32:8080Install the CA certificate from mitmproxy by visiting http://mitm.it in Chrome
on the Android box. Choose “Android” and install the certificate. You’ll likely
be prompted to set a pincode for the OS. Afterwards, you can test if the CA is
successfully installed by browsing to https://example.com. The intercepted
traffic should be visible in mitmproxy running on the host machine.
Installing an app
You can either download and install an app from the “Play Store” on the Android
box, or by installing an .apk file (e.g. obtained at
apk-dl.com) from your host machine:
adb install funda_v2.29.1_apkpure.com.apkInstalling Frida
Run from the host machine:
wget https://github.com/frida/frida/releases/download/12.2.16/frida-server-12.2.16-android-x86_64.xz
xz -d frida-server-12.2.16-android-x86_64.xz
Running Frida
Run the following commands from the host machine to install and run Frida with root privileges:
adb root
adb push frida-server-12.2.16-android-x86_64 /data/local/tmp/frida-server
adb shell "chmod 755 /data/local/tmp/frida-server"
adh shell "/data/local/tmp/frida-server --listen 0.0.0.0 &
The “repinning” script
Download the “repinning” Frida script written by Piergiovanni Cipolloni:
wget https://techblog.mediaservice.net/wp-content/uploads/2017/07/frida-android-repinning_sa-1.jsThis script will effectively hijack the initialisation of the SSLContext when our app starts, ensuring that the rogue CA certificate from mitmproxy we pushed earlier is used instead of the one that comes bundled with the app.
Starting the app
Find out the name of the package to run, from the host machine:
adb shell 'pm list packages -f' | grep fundaRun the program:
frida -U -f com.funda.two -l frida-android-repinning_sa-1.js --no-pauseIf all goes well, the script will do its job and overload the init process of the SSLContext:
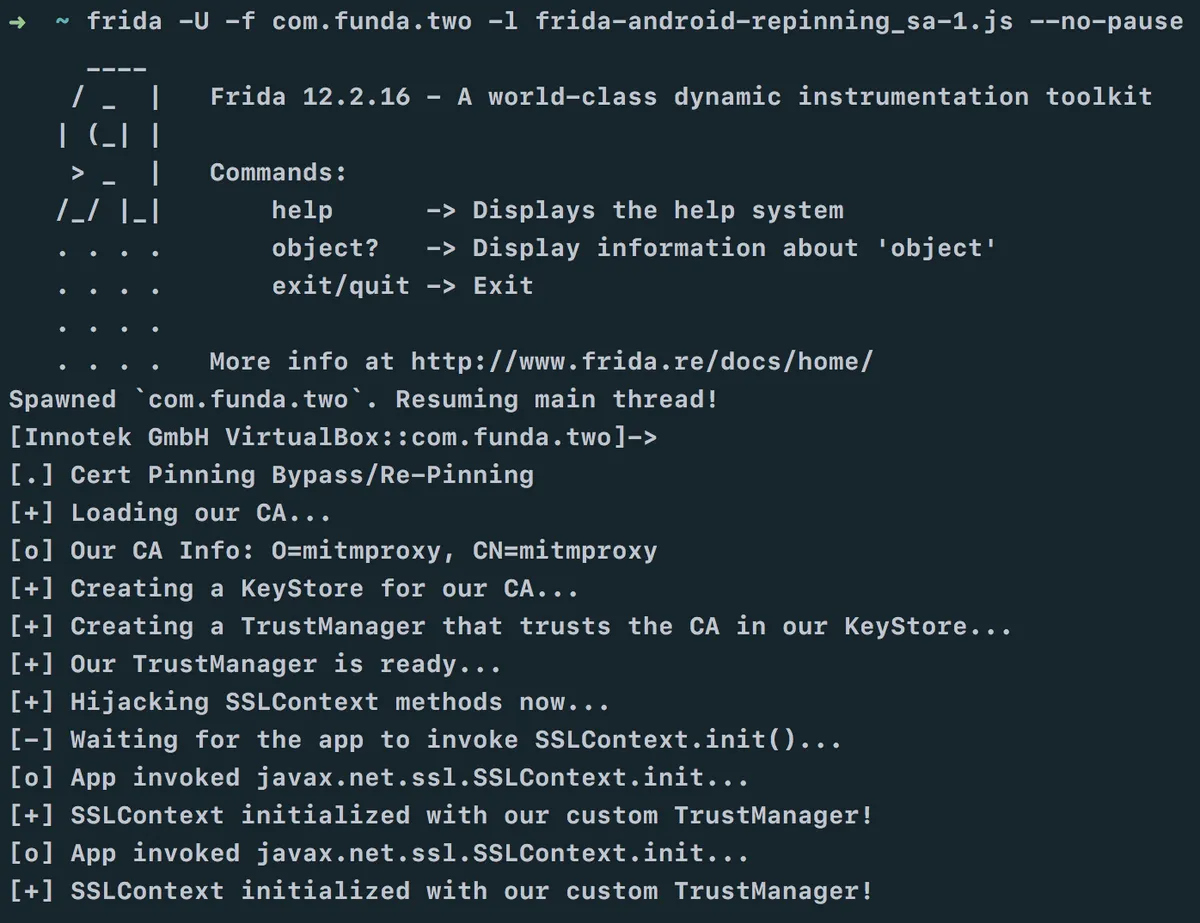
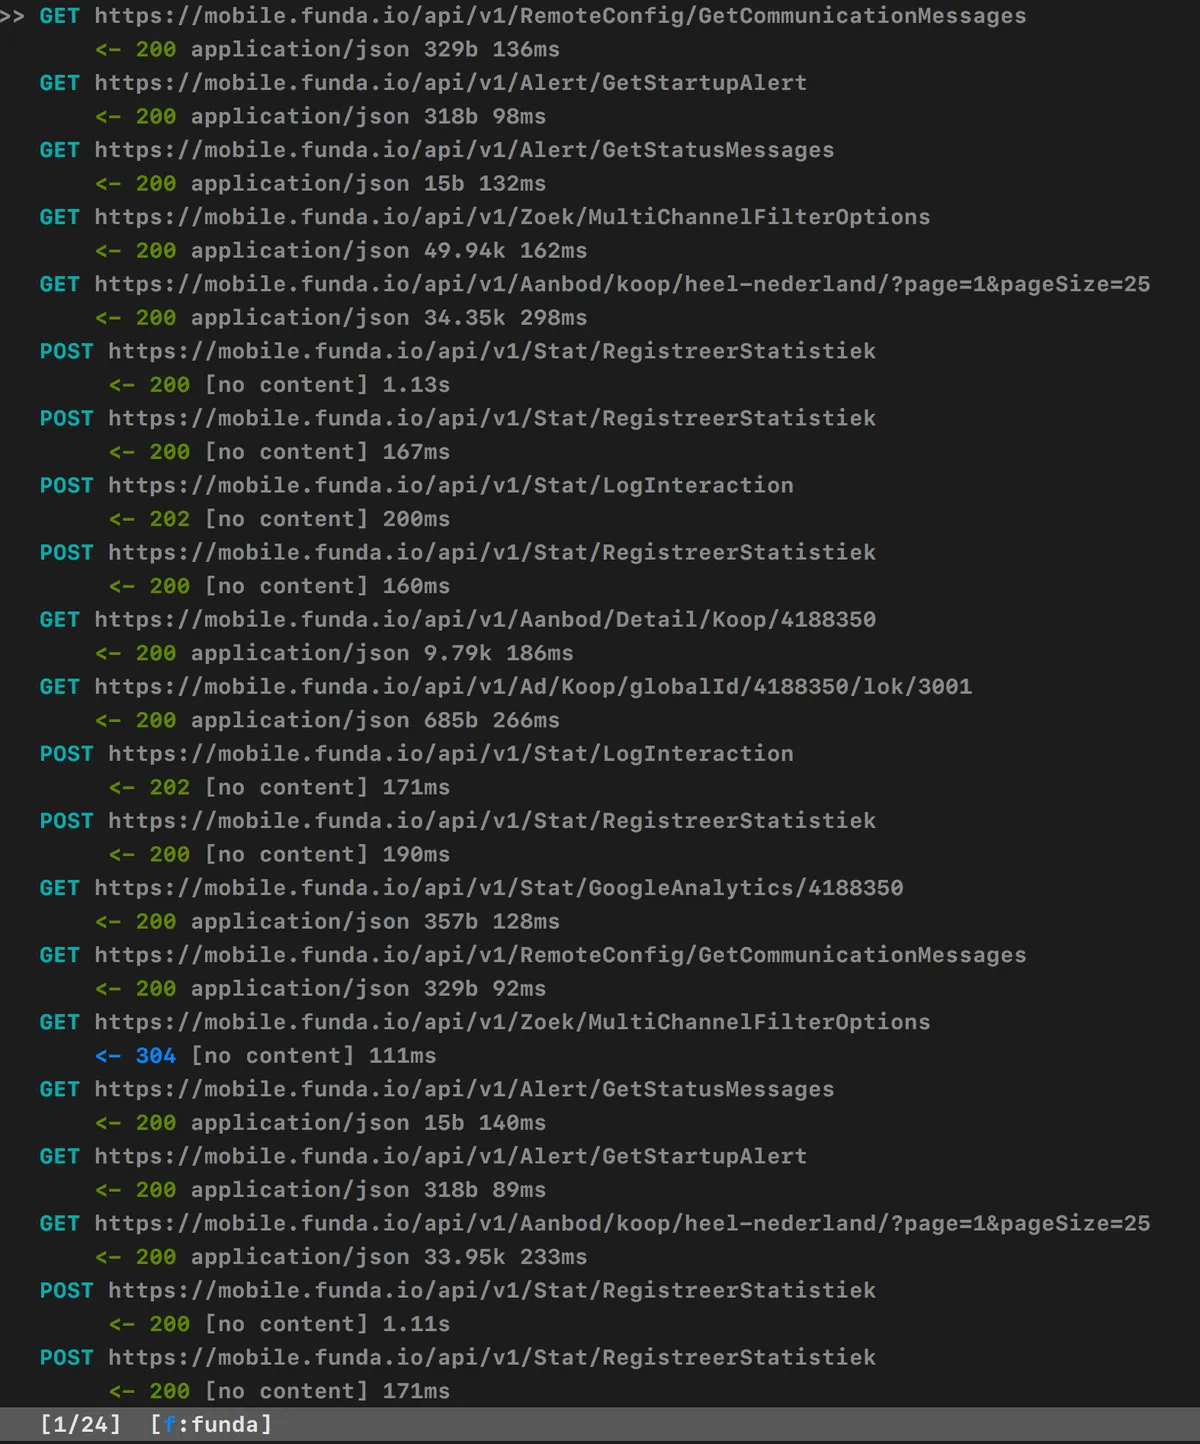
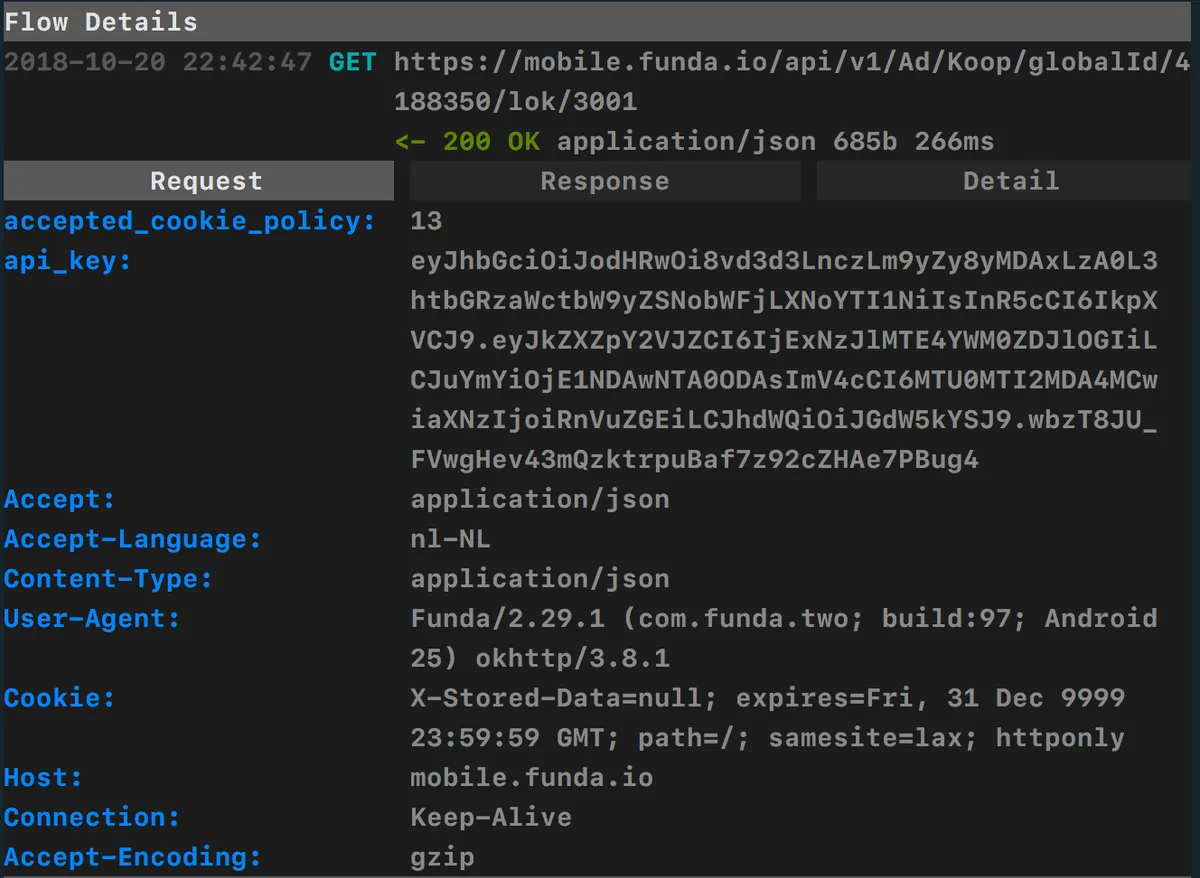
As we interact with the app (e.g. open a house listing) we can see the HTTP
requests being intercepted and logged in mitmproxy: